


Photo by Katherine Hanlon on Unsplash

Key Takeaways
- The corner lighting method produces the most even burn
- Rotate the joint while lighting to avoid canoeing
- Take slow, steady draws—don't puff like a cigarette
- Quality wraps and proper packing prevent most lighting issues
- Hemp wick provides cleaner ignition than butane lighters
Why Proper Lighting Technique Matters
Lighting a joint seems straightforward until you end up with a canoe, harsh hits, or a joint that goes out every thirty seconds. The way you light your joint determines how evenly it burns, how smooth each hit tastes, and whether you'll spend the next ten minutes trying to fix it.
A properly lit joint burns evenly from all sides, maintains a consistent cherry, and delivers smooth hits from start to finish. Poor lighting technique wastes your material, creates hot spots that taste harsh, and frustrates everyone in the rotation.
The good news: once you understand the fundamentals, lighting a joint becomes second nature.
What You Need Before You Light
Before striking that lighter, make sure you have the right setup. Your lighting source matters more than most people realize.
Choosing Your Ignition Source
Standard butane lighters work fine for most situations. They're convenient, reliable, and everyone has one. The downside is that butane can add a chemical taste to your first few hits, especially if you hold the flame too close.
Hemp wick provides the cleanest lighting experience. Light the wick with your lighter, then use the wick's flame to light your joint. This keeps butane away from what you're inhaling and gives you better flame control. Many experienced smokers won't use anything else.
Matches are traditional but require a few seconds to burn off the sulfur before bringing them near your joint. Let the match burn for 2-3 seconds, then use it. Never light with the initial sulfur flare.
Avoid candles, torch lighters, and anything with an overly hot flame. These create uneven burns and can scorch your material before it's properly lit.
Check Your Roll Quality
Even perfect lighting technique can't save a poorly rolled joint. Before lighting, inspect the twist or tip. It should be evenly packed from end to end—not loose at the top and tight at the bottom.
Give it a gentle squeeze along the length. You should feel consistent density throughout. If one section feels significantly looser, it will burn faster and cause canoeing no matter how carefully you light it.
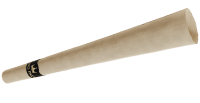
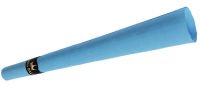
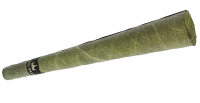
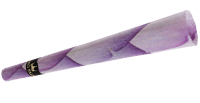
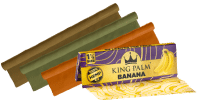
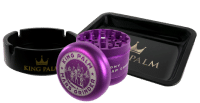
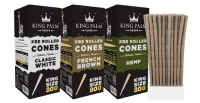
Quality wraps make a massive difference. Natural palm leaf wraps and pre-rolled cones burn more evenly than most papers because they're thicker and more consistent. Every King Palm pack includes a humidity pack to keep your wraps at optimal moisture—dry wraps burn too fast while overly moist ones won't stay lit.
The Corner Lighting Method (Step-by-Step)
This is the gold standard technique that produces the most consistent results. It takes an extra ten seconds but prevents 90% of lighting problems.
Step 1: Position the Joint at a 45-Degree Angle
Hold your joint at a slight downward angle with the tip away from your face. This angle keeps the flame from being pulled directly into the material too quickly and allows you to see what you're doing.
Don't put the joint in your mouth yet. You're going to light it first, then take your first draw.
Step 2: Apply Flame to the Corner Edge
Bring your flame close to the twisted tip or edge—about a quarter inch away. You're not trying to touch the flame directly to the paper. The heat should ignite it, not the contact.
Focus the flame on just one corner or edge of the tip. Watch as that section begins to catch and glow.
Step 3: Rotate While Lighting
Here's the key: slowly rotate the joint while maintaining the flame near the tip. This distributes the burn evenly around the entire circumference instead of creating a hot spot on one side.
Keep rotating until you see the entire edge glowing orange. This usually takes 3-5 seconds with steady rotation.
Step 4: Test the Cherry
Pull the flame away and look at the lit end. You should see an even, circular cherry glowing across the entire surface. If one side is darker or brighter than the others, briefly apply flame to the lighter areas while rotating.
Once the cherry looks even, you're ready for your first hit.
Step 5: Take Your First Draw
Place the joint between your lips and take a slow, steady draw. Don't puff rapidly like you would a cigarette—this pulls the burn too aggressively and creates uneven heat.
Take a 2-3 second pull, just enough to establish the cherry. You should see the entire tip glow brighter as you inhale. If only one side lights up, you need to relight using the rotation method.
Common Lighting Mistakes (And How to Fix Them)
Mistake 1: Putting It in Your Mouth First
Many people put the joint in their mouth and try to light it like a cigarette. This forces you to pull while lighting, which almost always creates an uneven burn because you can't control the flame properly.
Always light it first with the rotation method, then take your first draw once you've established an even cherry.
Mistake 2: Touching the Flame Directly to the Tip
Jamming the flame into the twisted end scorches the material and creates a harsh, unpleasant taste. It also tends to light just the center, leaving the outer edges unburned.
Keep your flame a quarter inch away and let the heat do the work. Patience here pays off in smoothness.
Mistake 3: Taking Massive First Hits
Your first draw should be gentle and controlled. Pulling too hard draws excessive oxygen through the joint, creating a fast, hot burn that's impossible to control.
Think of it as sipping, not gulping. Slow and steady establishes an even cherry that will last throughout your session.
Mistake 4: Lighting in Windy Conditions
Wind is your enemy when lighting. It blows the flame around unpredictably and causes extremely uneven burns. Even a light breeze can ruin your lighting technique.
Cup your hand around the tip to block wind, turn your back to the breeze, or step inside/behind something. If you're outdoors, find shelter before you attempt to light.
Dealing With Canoeing and Uneven Burns
Even with perfect technique, joints sometimes develop a canoe—when one side burns faster than the other, creating a lopsided cherry. This usually happens due to inconsistent packing or a gust of wind hitting one side.
The Quick Fix Method
If you catch it early, simply apply your lighter flame to the slower-burning side for 1-2 seconds while not inhaling. This "chases" the faster burn and evens things out.
Alternatively, lick your finger and dampen the faster-burning side. The moisture slows that section down temporarily, letting the other side catch up. This works but affects taste, so use it as a last resort.
Prevention Through Proper Packing
Most canoeing issues start with packing inconsistencies. When you pack a cone or roll a joint, pay attention to density. Tap the joint gently on a hard surface to settle the material, then add more if needed to eliminate air pockets.
Consistent packing creates consistent burns. It's that simple.
Relighting a Joint That's Gone Out
Joints go out. It happens during conversation, when passed slowly, or when rolled too tight. Relighting properly prevents harshness and wasted material.
Knock Off the Ash First
Before relighting, gently tap off any loose ash from the end. Old ash can block airflow and create a stale taste when you relight.
Check the cherry area. If it looks fine, proceed with relighting. If you see tar buildup or a crusty edge, you may need to carefully remove it with your fingers (let it cool first).
Use the Same Rotation Technique
Apply the corner lighting method exactly as you did initially. Bring the flame near the edge and rotate while the material catches. Don't just blast the center with heat.
Take a slow test puff once you see it glowing. The first hit after a relight is often harsher than normal, so keep that initial draw gentle.
Advanced Techniques for Specific Situations
Lighting in a Circle
When sharing with a group, the person lighting should establish a solid, even cherry before passing. This prevents the joint from going out on the second or third person and eliminates the "first hit advantage" where the lighter gets a perfect cherry and everyone else deals with a struggling burn.
Take an extra few seconds to make sure it's burning well, then pass it along. Your friends will appreciate the consideration.
Lighting Thicker Wraps
Natural leaf wraps like palm leaves are thicker than traditional papers, which means they take a few extra seconds to establish a proper cherry. Don't rush it.
Use the rotation method but apply heat for 5-7 seconds instead of 3-5. You may need to take a slightly stronger first draw to get air moving through the thicker material. Once lit properly, though, thick wraps maintain more consistent burns than thin papers.
Lighting Pre-Rolled Cones
Pre-rolled cones typically have more material at the lit end than hand-rolled joints, which means they need more initial heat to get going. The advantage is that once properly lit, they burn incredibly evenly due to their consistent shape.
Take your time with the corner lighting method on cones. Make sure the entire opening is cherried before your first draw. King Palm's pre-coned rolls are designed to burn evenly once properly established—the investment in careful lighting pays off throughout the session.
Hemp Wick vs. Butane: Does It Really Matter?
The debate between hemp wick and butane lighters is more than stoner philosophy—there are real differences in taste and health considerations.
The Case for Hemp Wick
Hemp wick burns at a lower temperature than butane, which means less risk of scorching your material during lighting. It also eliminates any butane taste from your first few hits, which is especially noticeable with high-quality material.
The flame control with hemp wick is superior. You can position the flame more precisely, making the rotation lighting method easier to execute. Many people also prefer avoiding the repeated butane inhalation that comes with using a lighter multiple times during a session.
The Case for Lighters
Butane lighters are convenient, windproof (if you have a decent one), and don't require a two-step ignition process. For most people in most situations, a quality lighter works perfectly fine.
If you're going to use a lighter, invest in a decent one with a consistent flame. Cheap gas station lighters with weak, flickering flames make proper lighting technique nearly impossible.
How Your Wrap Choice Affects Lighting
Not all wraps light the same way. The material, thickness, and moisture content all impact how easily your joint lights and how evenly it burns.
Traditional Rolling Papers
Thin papers light quickly but can burn too fast if you're not careful. They're also more prone to canoeing because they're so thin that even minor packing inconsistencies create burn rate differences.
Rice papers burn slower than wood pulp papers. Hemp papers fall somewhere in between. All require consistent packing and proper lighting technique to avoid issues.
Natural Leaf Wraps
Palm leaf and other natural wraps burn more slowly and evenly than papers. The thickness provides more forgiveness for minor packing variations, and the natural structure creates a more consistent burn.
The trade-off is that they need more initial heat to get started. Use the corner lighting method religiously with natural wraps—rushing the lighting process on thick wraps almost always leads to partial lighting and frustration.
The Moisture Balance
Whether you use papers or natural wraps, moisture content is critical. Too dry, and your joint will burn fast and hot with a harsh taste. Too moist, and it won't stay lit.
This is why proper storage matters. Keep your wraps in their original packaging with humidity control. King Palm products come with a humidity pack in every pouch specifically to maintain that ideal moisture balance for optimal burning.
Troubleshooting: When Nothing Seems to Work
The Joint Won't Stay Lit
This usually means one of three things: it's rolled too tight, the material is too moist, or you're not pulling hard enough to maintain the cherry.
Check the draw by pulling on it without lighting. You should feel slight resistance but steady airflow. If it feels like sucking a thick milkshake through a straw, it's packed too tight. Gently squeeze and massage the joint to loosen it slightly.
Every Hit Tastes Harsh
Harsh hits despite proper lighting technique usually indicate you're burning too hot. This happens when you pull too hard, creating excessive oxygen flow that superheats the cherry.
Take slower, longer draws instead of quick, hard puffs. Let the joint rest for 30 seconds between hits in a rotation. If you're smoking solo, pace yourself—constant puffing keeps the cherry too hot.
It Keeps Canoeing No Matter What
Persistent canoeing that returns even after correction means inconsistent packing. There's no lighting technique that can compensate for material that's significantly denser on one side than the other.
The solution is prevention: focus on even packing before you light. For cones, use a packing tool to compress material evenly. For rolled joints, distribute material carefully during the roll and don't over-tighten one section.
Frequently Asked Questions
Should I light the twisted tip or untwist it first?
Light the twist directly—don't untwist it. The twisted tip acts as an ignition point that helps establish an even burn. If you untwist it, you're left with loose material that's harder to light evenly. Simply apply the corner lighting method to the twisted end and let the technique do the work.
Why does my joint go out constantly?
Joints that won't stay lit are usually packed too tight, restricting airflow. Test the draw before lighting—you should be able to pull air through relatively easily. If not, gently squeeze and roll the joint between your fingers to loosen it. Alternatively, if the material is too moist, let it dry for 15-20 minutes before lighting.
How close should I hold the lighter flame?
Keep your flame about a quarter inch away from the tip—close enough to apply heat but not so close that you're jamming flame directly into the material. The heat should ignite the wrap, not the direct flame contact. Think of it like toasting bread: you want radiant heat, not direct flame touching.
What's the best way to light a joint in wind?
Wind makes proper lighting nearly impossible, so your priority is creating a wind break. Cup both hands around the tip with the joint between your palms, leaving just enough space to bring the lighter in. Turn your back to the wind. If possible, duck behind a wall, car, or large object. In truly windy conditions, consider waiting for better circumstances—fighting the wind wastes time and material.
Do I need special tools or accessories to light a joint properly?
No special tools are required—a standard lighter and proper technique are all you need. That said, hemp wick improves the experience by providing cleaner ignition and better flame control. Some people like using glass tips or filters, which don't affect lighting but can improve airflow consistency. Quality wraps matter more than accessories: well-constructed palm leaf wraps or properly packed cones will light and burn more evenly than any accessory can compensate for with low-quality materials.


